We will show you here how to configure the CWP module for WHMCS. This module is offered for free by CWP.
Notice that WHMCS is not free and you should purchase a license from whmcs.com or from a partner. Licenses from whmcs.com start at $15.95/month.
Steps on how to install the module:
- Download the CWP WHMCS module.
Login to your CWP installation and go to Billing->WHMCS from the left menu. Follow the link, download the zip archive and extract it. There is only one file in the archive – /cwp7/cwp7.php
 - Upload the file cwp7.php to WHMCS_directory/modules/servers/cwp7/cwp7.php
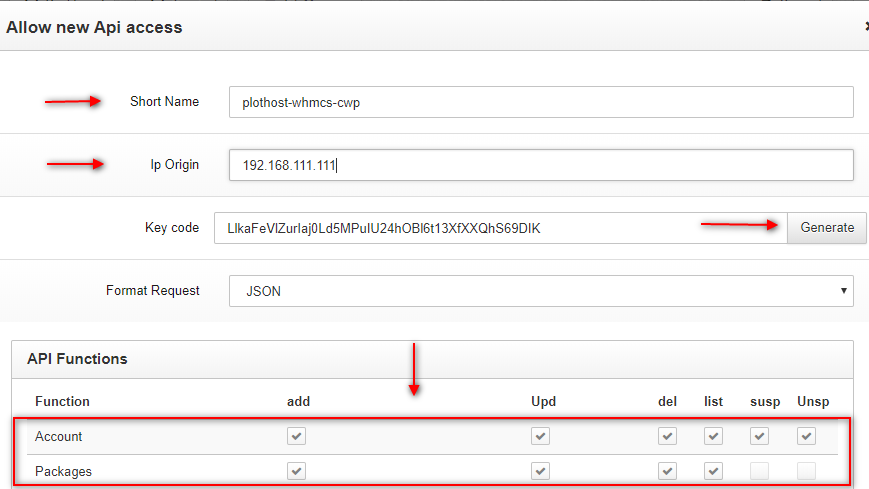
- Generate an API key to allow WHMCS to connect to your CWP server.
For this go to CWP->CWP Settings-> API Manager
Enter a name for the key, the IP of the server where you have WHMCS installed, click the Generate button and select the API permissions as:
– for accounts: add, upd, dell, susp, unsp
– for packages: add, upd, del, list - Click the Create button to add the key to the system.Take notice of the CWP message: For the correct operation of this tool you must open port 2304 in the firewall
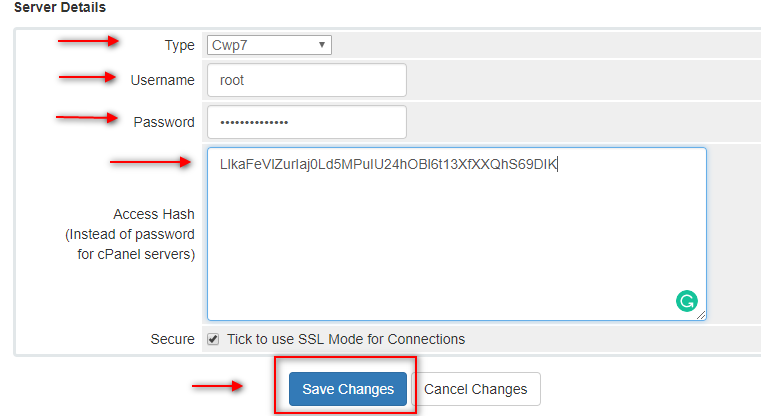
- Now go to WHMCS->Setup->Products/Services->+Add New Server. Enter:
– Name, Hostname, IP address
– Primary and Secondary Nameserver with their IPs
– at Server Details: select server type as Cwp7, enter root username and password and paste the access key.
- Click the Save Changes button. You will now be able to create/delete new user accounts in WHMCS.

That is the worst instruction I have seen in a long time, the video is on a windows machine, and where to do this WHMCS->Setup->Products/Services->+Add New Server?